How do I show touches when screen recording on iPad?
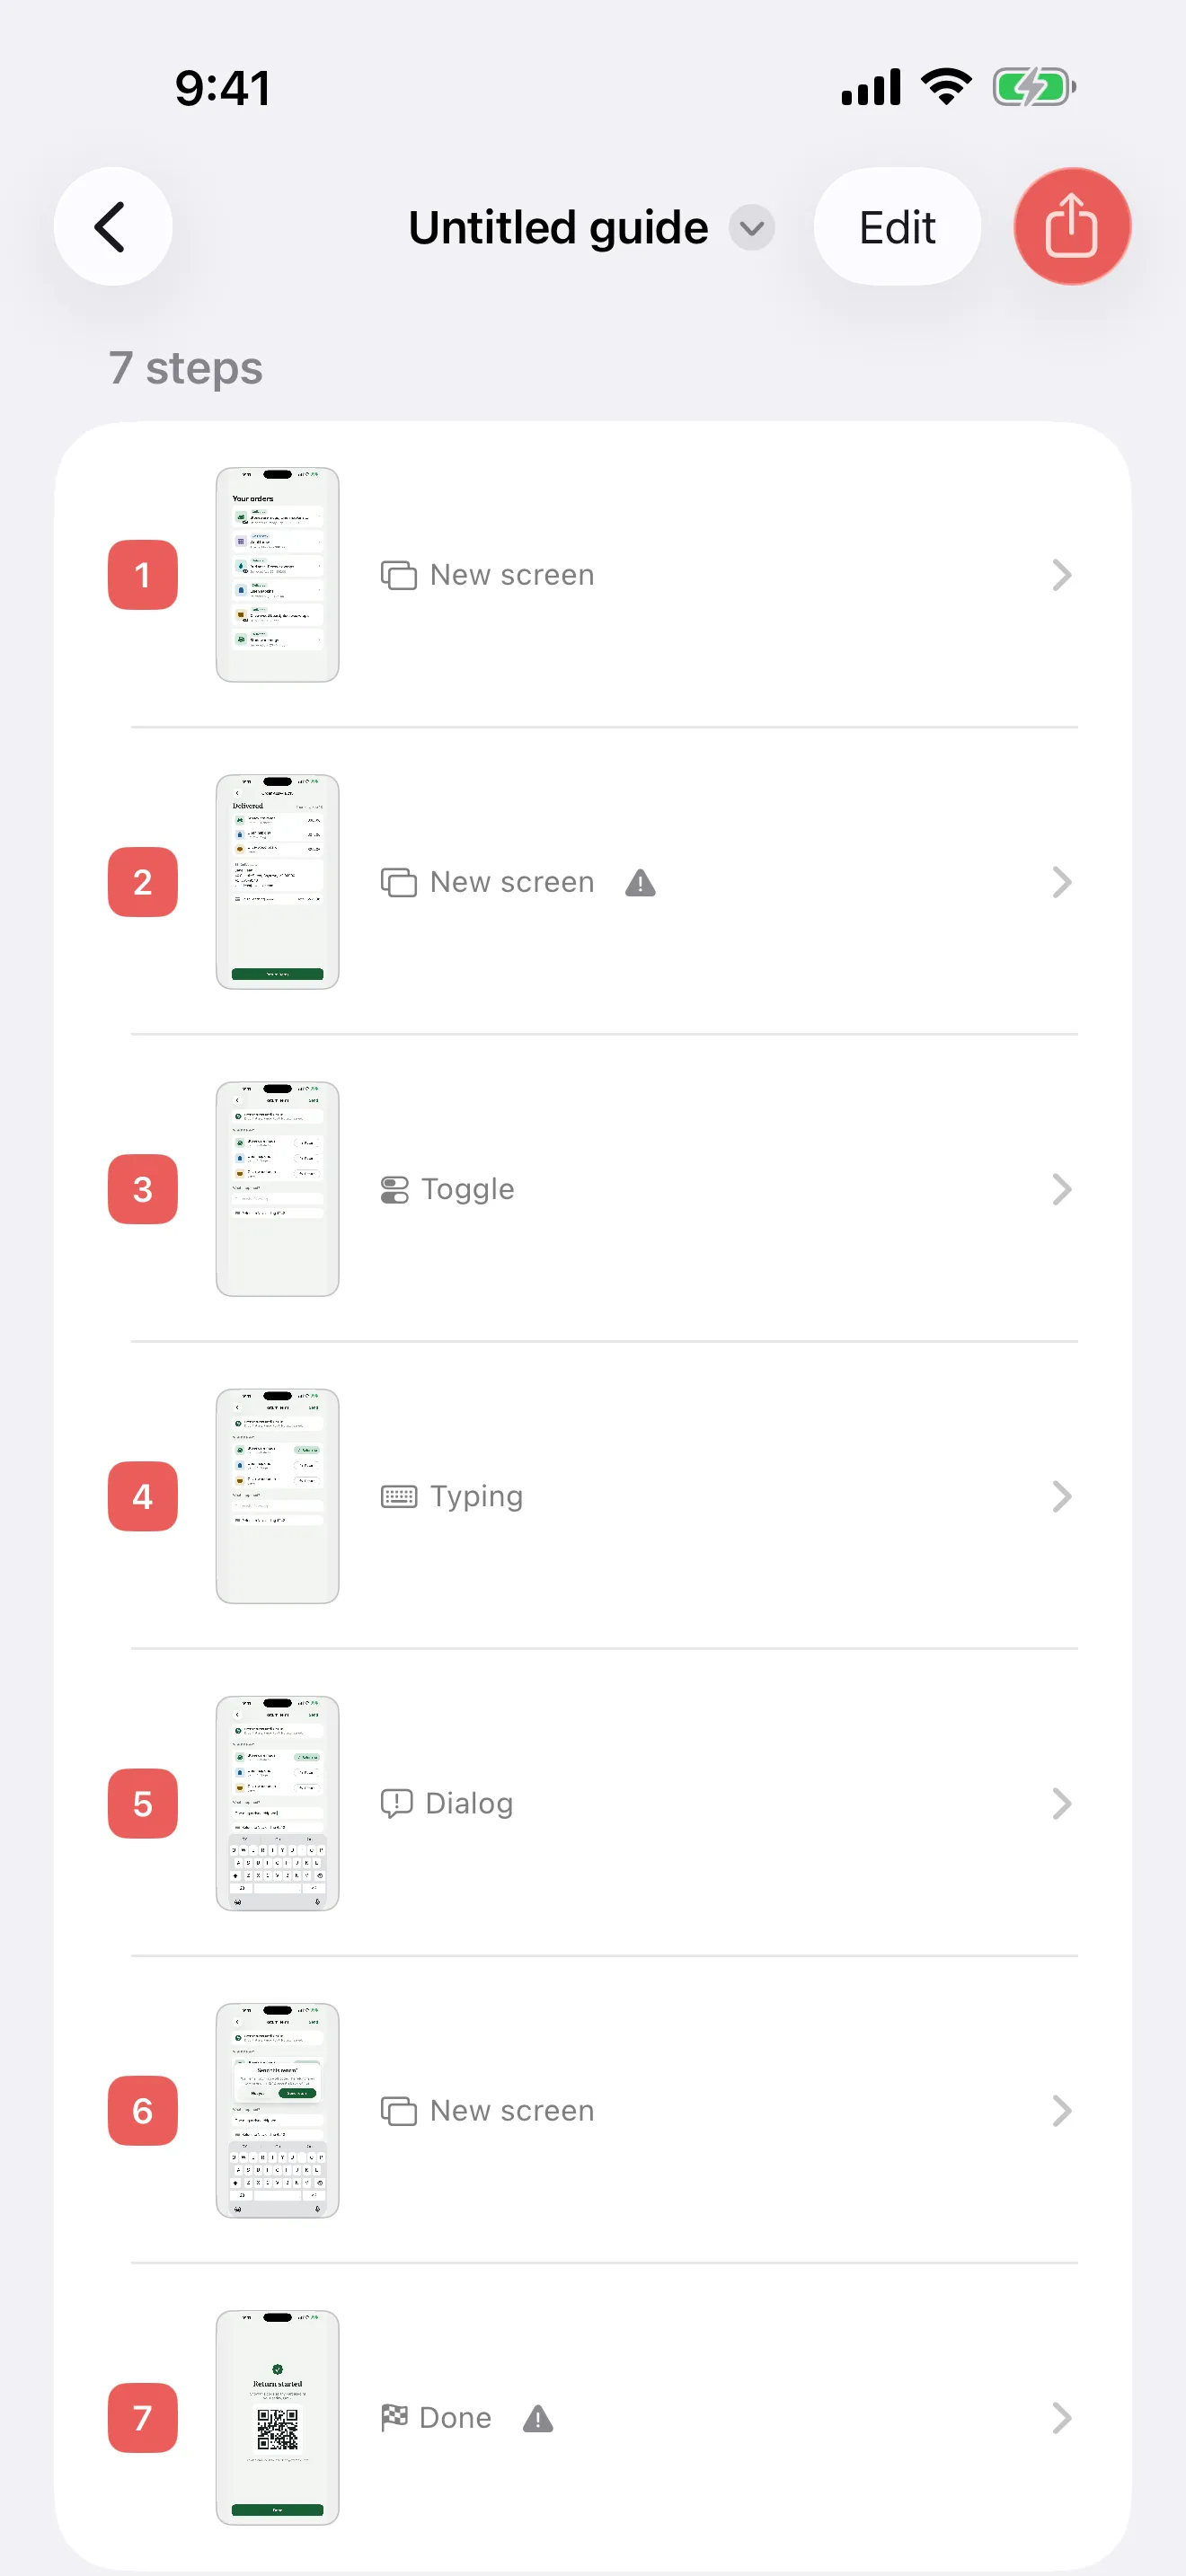
iPadOS has no show-touches switch. Record with a mouse or trackpad pointer instead, or add tap markers afterwards with Walkthru and Apple Pencil.

Walkthru team
iPadOS has no setting that shows your touches in a screen recording. The built-in workaround is to connect a mouse or trackpad and run the demo with it, because its round pointer appears in the recording; Settings > Accessibility > Pointer Control makes it bigger and stops it hiding. To show taps in a finished guide or video, add tap markers afterwards in Walkthru, with your finger or Apple Pencil.
In this article
Show where you tap in an iPad screen recording
Connect a mouse or trackpad
Pair a Bluetooth mouse or trackpad, or use a keyboard case with a trackpad. A round pointer appears on the screen as soon as you move it.
Make the pointer easy to see
Go to Settings > Accessibility > Pointer Control. Make the pointer bigger, give it a colour, and turn off Automatically Hide Pointer.
Record the demo with the pointer
Open Control Center and start a screen recording. Do the whole task with the mouse or trackpad, not your finger, so the pointer stays visible and every click is shown.
Check the recording
Play the recording back in Photos. If the pointer is too small or vanishes, adjust Pointer Control and record again.
Or add markers afterwards
Import the recording into Walkthru and place tap, press-and-hold or swipe markers on each step with Apple Pencil. Export a PDF guide or a video reel with animated markers.
The quick answer: use a pointer
The iPad records its screen without any mark where your finger lands, and there is no switch to change that. The iPad does have something the iPhone does not use by default: a pointer. Connect a mouse or trackpad, and a round pointer appears on the screen and in the recording.
That is how many iPad tutorial makers do it. Gary Rosenzweig of MacMost explains that the circle in his iPhone and iPad videos “is just the pointer you get when you connect a mouse to your device” (MacMost).
Any Bluetooth mouse or trackpad works, as does a keyboard case with a trackpad.
Make the pointer easy to see
The default pointer is small and grey, and it hides itself when you stop moving. Change that before you record (Apple’s Pointer Control settings):
- Go to Settings > Accessibility > Pointer Control.
- Turn up Pointer Size.
- Pick a Color that stands out against the app you are recording.
- Turn off Automatically Hide Pointer, so it stays visible between clicks.
- Turn on Increase Contrast if the pointer is hard to see on a busy screen.
Record the demo
- Swipe down from the top-right corner to open Control Center.
- Tap the Screen Recording button and wait for the three-second countdown (Apple’s instructions).
- Do the whole task with the mouse or trackpad. Move slowly, and pause on each screen.
- Stop the recording from the red button at the top of the screen, then play it back in Photos.
Use the pointer for everything, including scrolling. The moment your finger touches the screen, the pointer gets out of the way, and that part of the demo loses its circle.
Or add touch markers afterwards
A pointer suits a demo someone will watch from start to finish. For a guide someone follows step by step, markers you place afterwards are clearer. They sit exactly on the button and they stay on the page.
Walkthru splits an iPad screen recording into one screenshot per screen. On each step, place a tap, double-tap, press-and-hold or swipe marker with your finger or Apple Pencil, and pick one of seven colours. Then export:
- a PDF guide or Step images, with the markers drawn into the pictures;
- a Video reel, where each marker animates in once the screen has settled.
The markers show the instruction, not your original touches. Walkthru cannot see where your finger landed, so you place each marker yourself.
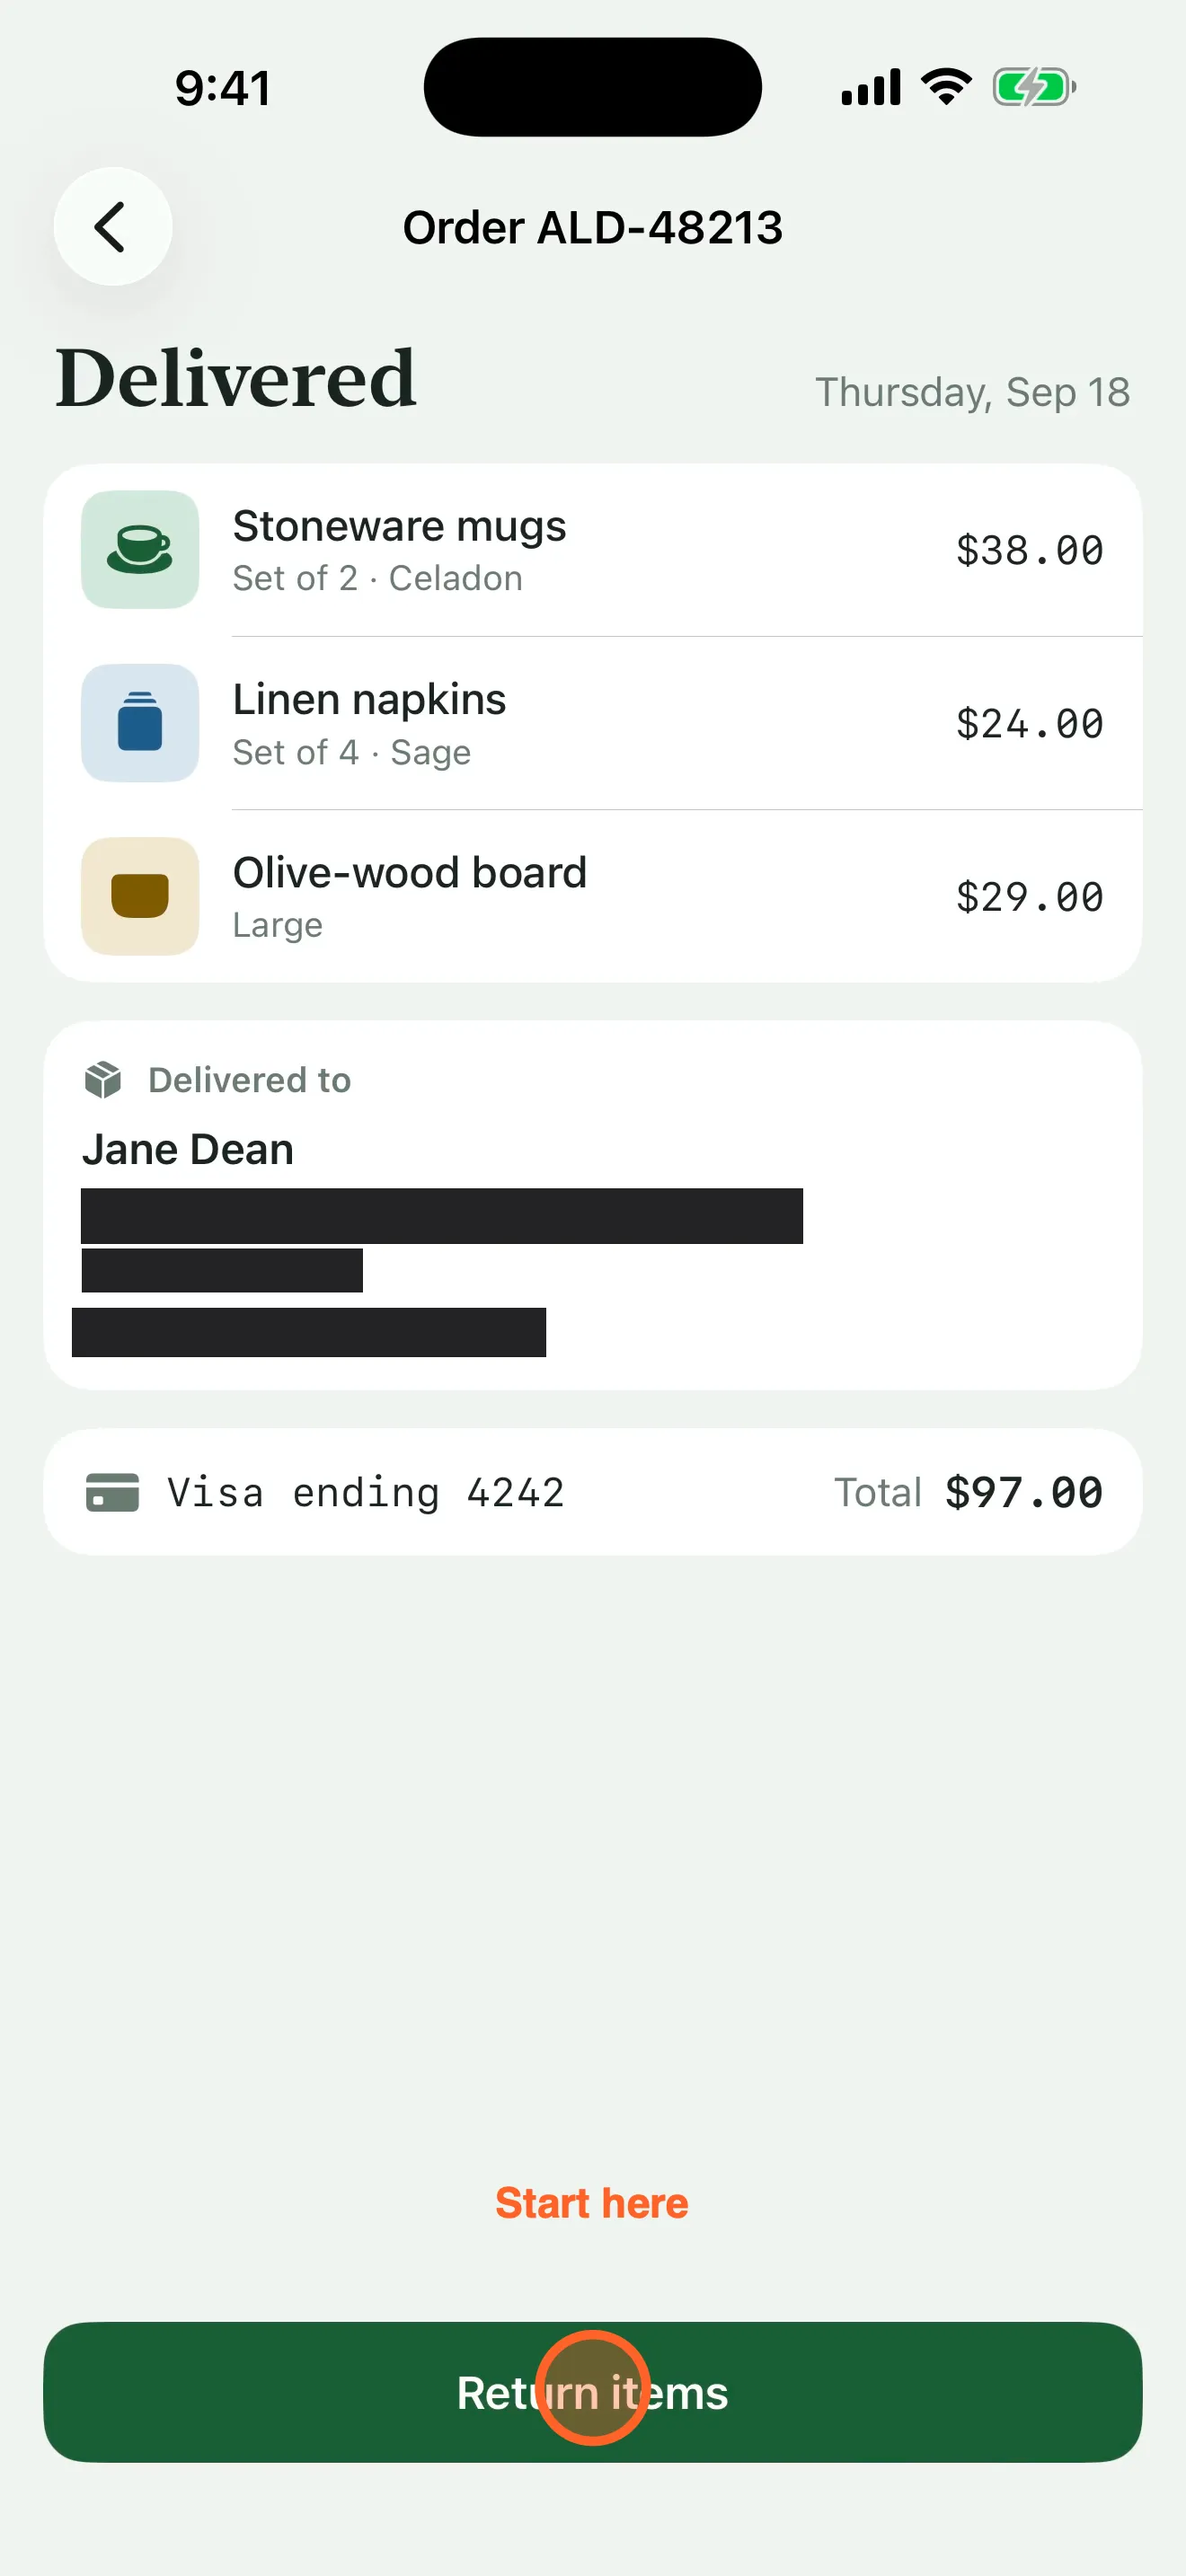
A step exported by Walkthru with a tap marker and a label added in the editor.
Which one to use
| You want | Use |
|---|---|
| A narrated demo to post as a video | The pointer, recorded live |
| A printed or PDF guide people follow step by step | Markers added afterwards |
| A short video with clear tap circles on every step | Markers, exported as a video reel |
| Touches shown on a TV during a live presentation | Mirror the iPad and use the pointer, after checking it shows on the TV |
When it goes wrong
| Problem | Fix |
|---|---|
| The pointer vanishes between clicks | Turn off Automatically Hide Pointer |
| The pointer is too small to see in the video | Turn up Pointer Size and pick a bolder Color |
| Some taps have no circle | Your finger touched the screen; do the whole demo with the mouse or trackpad |
| The recording is black | Some apps do not allow their content to be recorded, and Apple notes this |
| Recording stopped when you started mirroring | You cannot record and mirror at the same time |
On an iPhone, see showing taps in an iPhone screen recording.
Related questions
Is there a Show Touches setting on iPad?
No. The iPad's screen recording options offer only the microphone. Android has a developer option for showing taps, but iPadOS does not.
Why does the pointer disappear when I tap the screen?
The pointer shows while you use the mouse or trackpad. Touch the screen with your finger and it gets out of the way. Do the whole demo with the mouse or trackpad, and turn off Automatically Hide Pointer in Pointer Control.
Can I use AssistiveTouch instead?
AssistiveTouch can replay a custom gesture as a visible circle, the same way as on iPhone, but each tap you want shown has to go through the gesture. A mouse or trackpad pointer is simpler for a full demo.
Can I add tap circles to a recording I have already made?
Yes. Import it into Walkthru, which splits it into steps, then place a marker on each step. The markers are drawn into PDF and image exports and animate in a video reel. They are placed by you, not recovered from the original touches.
Can I record the screen while mirroring it to a TV?
No. Apple notes that you cannot record your screen and use screen mirroring at the same time. For a live demo, mirror without recording; for a tutorial, record without mirroring.
A little more to explore
Keep reading
Getting started
How to show taps in an iPhone screen recording
iPhone screen recordings hide your taps. Add tap markers afterwards in Walkthru, or try an AssistiveTouch custom gesture while you record.
PDF & exports
Add a voiceover to an iPhone screen recording
Talk while you record on iPhone or iPad, or add a voiceover afterwards, one step at a time, over a recording or screenshots. Includes a script pattern.
Getting started
How to make a step-by-step guide on iPhone or iPad
Record a task once, or use screenshots you already have, and turn it into a step-by-step guide with tap markers, redactions and a PDF, on iPhone or iPad.